Monday, June 28, 2010

Creamy delicious homemade butter


This is completely unrelated to anything.  I did it out of sheer curiosity - although now that I've tried it, I might be a convert.  Making fresh butter was way the heck easier than I thought ever - took no where near as long as the shake-a-jar method one of my grade school teachers had us do where we shook a cup of cream in a jar for half an hour.

Once again I employed my mini food processor - a tool I used to wonder why I purchased, now known as my mayo maker and now butter maker.  If you have a stand mixer that would work too, you could probably even pull it off with a hand mixer or whisk but that's not the kind of exercise I want thanks...

Home made butter is creamy and sweet and delightfully lighter than store bought.  Plus since I control the ingredients, I can make it unsalted without any coloring or additives.

For the butter;

2 cups of heavy cream (not half and half - real heavy cream)
salt to taste (or not if your doctor is like mine and also says you're going to have a stroke any second now...)

Pour the cream into the processor, blend the cream.  First it will turn into whipped cream, then if you keep going, you'll see it begin to reduce in volume as the milk fats start to stick together.  Eventually, you'll see the butter start to form crumbles and you'll notice a fair amount of liquid begin to gather - this is the BEST buttermilk you'll ever taste, think of it as a little treat for the cook.

Pour the contents from the mixer into a cotton cloth over a sieve and squeeze to compress and form the butter, and strain the butter milk.  You'll want to squeeze out as much of the buttermilk as possible, it'll help the butter stay fresher longer.

This fresh butter would be fantastic with honey mixed in on pancakes, or chives on a potato - garlic and herbs on grainy, seedy dinner rolls.  All manner of yummy!

Schmancy looking super simple cream puffs

I love these things - they're eggy and rich and light and fluffy all at once - similar to pop-overs which I fully intend to try sometime very soon...

The shells are awesome, you can fill them with all manner of things, I'm going to put a huge scoop of coconut ice cream in them tomorrow for my friend Sophie at work.  She's skinny.  I'm trying to fix that.  Against her will maybe...

Anyhow malicious intent aside, you can fill these with all manner of things - whipped cream and sliced fruit for example, custard if you're feeling fancy, whipped cream for a light treat, ice cream for a cold treat, etc.

To make the puff shells;

Oven to 400 degrees

1 cup of water
1/2 cup of butter (4 oz)
1 cup of flour
about 1/4 tsp. of salt (I use a smidge less.  Dr.'s orders.)
4 large eggs

combine the flour and salt and set aside

in a fair sized pot boil the water, add the butter and melt it down completely, turn the heat down to medium
Add all the flour at once and stir until fully incorporated, and the dough comes away from the sides of the pot - it will still be a little sticky but it should come off the sides relatively cleanly.

Now you're going to start adding the eggs - one at a time.  Upon adding each egg, you'll find the dough gets a little gloopy - keep blending until the dough is smooth again, then repeat one egg at a time until all four are incorporated.  The dough will start to look like this;

Now spoon the dough onto a lightly greased cookie sheet (or a silpat if you are like me and never want to scrape caramelized anything off your bakeware).  I find that this recipe makes about 12 large puffs, you could certainly make them smaller, just keep in mind that they expand when they bake so you need to leave space between them.

Now pop them in the oven - they'll puff and turn golden brown and crisp on the outside in about 15 to 20 min - individual ovens vary so keep an eye on them.  Try to avoid opening the oven though, the puffs can deflate if the oven temp changes too much - peek thru the window on the oven to check and see if they're done;


When they're done, pull them out of the oven and let them cool - now you can either enjoy them just like this - slice them in half stuff them with your favorite filling!

If you want to show off a little you can dip them in chocolate as well.  Melt a bowl of chocolae in the microwave, and gently dip and twist the top of the puff into the melted chocolate.  I dipped about half of them in coconut;


The shells themselves aren't sweet, so you could in theory make a savory puff from these as well - perhaps a filling of salmon with a touch of hollandaise sauce, or a nice tuna salad with celery for texture?
Use your imagination!!

Monday, June 14, 2010

Ginger Orange cheater's ribs


I have to start this post by admitting something.  I cheat.  Bad.  That is to say I am fully aware of the merits of slow roasting ribs until they are falling off the bone.  I have neither the time nor the patience (and it makes my microscopic NY apartment to damned hot) to do it that way.

That said, this is a manageable recipe that you can pull together in time for dinner on a weeknight (ok maybe a late ish dinner but still....)

Fresh ginger, grated - about a table spoon
4 juice oranges squeezed (between one and two cups of juice)
thyme
rosemary
garlic - I like smashed cloves
sage
olive oil
salt and pepper to taste
baby back ribs - about 4 to 6 bones per person 

Oven to 400

In a bowl, grate the ginger - add the orange juice and set aside
rub the ribs with the smashed garlic cloves, then sprinkle with salt and pepper
on a foil wrapped baking pan (I used my lasagne pan this time, but a cookie sheet will do, and foil wrapped so you don't feel like setting yourself on fire later when you're cleaning up), arrange the ribs and sprinkle the fresh herbs liberally about the pan and on the meat.  Toss in a handful of garlic cloves, and drizzle with olive oil.  Take your orange/ginger juice and pour half of it on the ribs coating them nicely.

Pop the whole kit and caboodle in the oven and let it roast at 400 degrees for about 10 min or until the meat starts to brown.  Turn the heat down to 325 (ish), and baste the ribs once with the orange ginger juice.
Leave it alone for about 30 min.

After 30 min has passed, baste the ribs with the remaining orange ginger juice - it'll take about another 30 to 45 min to finish roasting and voila - yummy cheater's ribs!!


Sunday, June 13, 2010

Bacon and Egg salad

I've been into poached eggs lately - can't tell you why.  But I've discovered this is my favorite salad lately.  It's easy to make, although the poaching part takes some practice - the first dozen or so eggs came out either under or over cooked every time...

Slab bacon - I recommend always keeping it around the house - you can get it at places like th Amish grocery   stores in NYC or other grocery stores that have a deli counter, or from Fresh Direct.
Mixed greens - I like the spring mix with frisee  and a bit of baby arugula mixed in.  
Large fresh eggs
White or cider vinegar
Balsamic vinegar
Olive oil
Sea salt (I used black lava salt in this case - hence the black flecks)
Dash of Parmesan

Dice the bacon into big chunks, and cook over medium heat until it gets to your favorite level of crispyness
set it aside, don't drain the pan
In a small sauce pot, bring water to a boil - you want it to be a couple of inches deep 
Add a splash of white or cider vinegar - it helps to keep the egg together during poaching
Crack the egg into a small bowl - it helps to ease the egg into the water, making it easier to retain the shape
Once the water is boiled, turn the heat all the way down but not quite off.  Slide the egg into the water gently.
Let the egg cook between 4 to 7 min - this is the experiment part, it depends entirely on how soft you like the egg.  I find my sweet spot is right about 5 and a half minutes.
Once the egg is cooked, lift it gently out of the water using a slotted spoon.  Set it on a paper napkin to drain.
In the pan where you cooked the bacon, add a bit of olive oil, and the balsamic (red or white) pour that over the greens and toss to mix.  Pop the greens on a plate and sprinkle (liberally!) with the cooked bacon.  Top with a poached egg, and a little pinch of salt right on the egg.
Dig in!!


Friday, June 4, 2010

Onion and Fennel tart (or Tomato - alternate idea included)

This looks much more difficult that it needs to be - by employing store bought pastry dough, this dish is as easy as toast!

Oven to 325 - or whatever the pastry package recommends (mine says 400 but my oven is such that 350 works)

One large sweet onion like a vidalia
A couple Shitake mushrooms - sliced thin
A hand full of fennel seeds
Ricotta cheese
Feta cheese - crumbled
Store bought pastry sheets
Olive oil
Sea salt
Ground pepper

Thaw out the pastry sheet according to instructions - curl and pinch the edges up just a smidgen - that'll help keep the toppings in place.
Smear the top with a layer ricotta (not too think) - go for even if possible, no need to be fanatical about it though, the idea is to let it look hand made (read: imperfect).

Slice the onions into thin slices - using a mandoline makes it easier - set them in a bowl, and drizzle with olive oil.  Add a shake of salt and pepper and toss to coat.
Spread the onions out on top of the ricotta fairly evenly, then scatter the shitake amongst the onion.
Do the same with the fennel seeds
Top with the crumbled feta

Pop the whole kit and kaboodle into the oven and bake until the pastry is brown and the onions are cooked through.

For a milder onion flavor, saute the onions in a pan over medium heat with the olive oil and a chunk of butter until they start to become translucent - then put them on top of the ricotta.  I usually prefer it this way, but the tart above was for folks that like onions a bit more than I do!

If you don't like onions at all, you can substitute tomatoes for a tart like this;


Substitute Cherry tomatoes for the onion, and Shitake
Fresh Basil for the fennel
Add garlic and pine nuts if you have them
Ricotta cheese
Mozzarella and Parmesan for the Feta
Store bought pastry sheets
Olive oil
Sea salt
Ground pepper

Score the cherry tomatoes and stuff a little chunk of mozzarella in the middle
In a pan over medium heat, saute minced garlic and pine nuts in olive oil till the garlic starts to soften and become fragrant.
Follow instructions on the package to prepare the pastry, spread the ricotta, then place the cherry tomatoes on the cheese (you don't really have to line them up like I did, I was just in a mood for organized veggies.

Once all the tomatoes are set sprinkle on a little salt and pepper, and drizzle the garlic/olive oil mix over the entire sheet.  Top with grated Parmesan and pop into the oven.
Before serving, cut or tear the basil and sprinkle evenly over the tart

Super Low Carb Turkey Burgers!


One of my favorite kitchen tools is my George Foreman grill.  now normally I wouldn't advocate anything that is sold late at night in program length commercials, the Foreman grill or a grill like it would be the one exception.  I have the smallest model, which is great for me since I usually only cook for myself.  I can make everything from beef burgers to bacon in it, and there's little if any smoke, and hardly takes any time at all!

Of course any time I say Foreman's Grill, you can use a pan and cook on top of the stove, but if you're going to invest in one appliance (and by invest I mean as little as $20), this might just be the one.

For Turkey Burgers;
Turn on the grill and let it heat up - mine has no temp age so just let it heat.

Ground turkey - one package (about 1lb)
One packet of dry salad dressing mix - Good Season's has several varieties (http://brands.kraftfoods.com/goodseasons/flavors/dry-salad-dressing-and-recipe-mix/)  I like the garlic and herb variety for this recipe
Whole butter lettuce leaves (or iceberg, or romain - any large leaf salad green will do)
2 or 3 think slices of beefsteak tomato (or heirloom or whatever kind of tomato you like)
A good smear of homemade mayo

In a large bowl, mix one package of ground turkey, with one package of the dressing mix.  When the mix is thoroughly incorporated, divide the turkey into three to four equal parts.  I usually use those snack sized zipper baggies, and shape and flatten the patties so I can freeze them.  They come up out as single serving rectangles that are easy to pop on the grill later.

Place the patty on the Foreman Grill, and let it cook - about 7 min then turn it over - you can make fancy grill marks if you give it a quarter turn when you flip it - and cook for another 2 or 3 min. (Times are approximate)

While the burger is cooking, wash, dry and stack 2 leaves of butter lettuce for each "bun"
Add a smear of homemade mayo, and a couple of slices of tomato
Place the finished burger on the tomato, and add a couple bits of cheese if you like -I used brie
Top with two more washed dried leaves of lettuce

If you're watching your carb intake like I am, you can eliminate the tomatoes, although I love them and since the carb count is negligible, I choose to include them.

Summer BBQ envy - RESOLVED!!  WOO HOO!  Enjoy!

Thursday, June 3, 2010

Whole wheat pasta with crispy pancetta

Pasta is one of my favorite things to make.  If you can resist the desire to smother it with sauce, a little creativity can make you look like a freaking badass.  The really nice thing about this and some of the other pasta dishes I like to make is that if you take a little time, and do the prep work, you can put things into small containers and make a variety of different pasta dishes over the course of a couple of days - effectively making your own series of heat and eat meals!

Whole wheat pasta - I like it for the nutty taste, prepared according to package instructions
Asparagus - cut into bite sized pieces, and lightly boiled (2-3 min, to where it's still crunchy/firm)
1 can white beans drained and rinsed
olive oil - I like extra virgin for the taste
truffle oil
pancetta - don't ask me how much, if it's bacon or bacon- like, I always add too much.
diced tomato
minced garlic

Prepare the pasta, drain and return it to the pan that was used to cook it.  In a separate pan heat olive oil - add garlic and sauté until garlic becomes fragrant and slightly soft.  Add diced tomatoes and warm through, add asparagus as well, remove from heat

Add cooked pasta to the tomato mixture until you're happy with the ratio of pasta to tomatos.  Add asparagus and white beans and drizzle a bit of truffle oil over it.

Warm a clean pan -  carefully lay out pancetta and cook (like super thin bacon) until crisp.  Add crispy panchetta on top of your pasta mix either in individual bowls or in a main serving platter.

There are so many alternatives to this dish - for vegetarians, you could skip the pancetta for example.
Using the pasta and sautéed garlic you could add diced or shredded chicken instead
For a twist on carbonara - scramble an egg, chop it up and and bacon.
Feeling lazy?  How about a can of tuna, some celery and a spoon full of home made mayo?

Using the pasta as a base and mixing in numerous other ingredients makes for quick healthy options anyone can assemble.

Vegging out.

I am a card carrying carnivore - but some of the people I love dearly...?  Not so much.  For those dear friends, I busted out the mandolin, grabbed a bunch of colorful veggies and came up with this dish.

Oven to 325
For the veggie bake;
One eggplant - medium sized
One large zucchini
Two fair sized tomatoes
one and a half bags of shredded mozzarella (more or less)
about a cup - cup and a half of Parmesan cheese
couple tablespoons of mixed herbs (I use herbs de Provence - my favorite go to herb blend)

For the sauce;
one large tomato, diced finely
several tablespoons of capers - they're salty so it's to taste
two garlic clove minced to within an inch of it's life...

For the veggie bake;
Using the mandolin (carefully - I've got a nasty scar from the time I nearly split my finger in two lengthwise with mine.  Sucks.  I don't recommend it.) slice the eggplant first - have a bowl of salted water handy, and drop the slices in the salt water as you go along.  Eggplant can have a bit of bitterness to them, briefly soaking them in the salt water tends to make it go away.
Slice up the zucchini and tomatoes as well - thin uniform slices of everything.  You can peel the vegetables prior to slicing if you like, but I don't - I find it looks and tastes better if you leave the skin in tact. Once everything is sliced set it aside for a moment.

In a large bowl, mix together the cheeses and the herb mix - I do this to make it easier when you start to assemble the dish, of course you don't have to.

In a oven proof baking dish (round casserole, or lasagna pan or some such) arrange the veg in layers, each slice over lapping the next and alternate the layers with the cheese.  For example, a layer of eggplant, then zucchini then cheese then tomato - like you're building a lasagna, only with no noodles.

Make sure the top layer is cheese, it's one of the ways I use to gage if it's done - once the cheese starts to brown, the dish is probably finished.

So once you've finished building the dish, pop it in the preheated oven - with a lid if you have one - and let it bake for about half an hour.  If it starts to brown too fast turn the heat down to 300.

Once the top turns a nice golden brown, take the dish out of the oven and let it rest for a bit - at least 15 min or so.  It'll make it settle a bit and make it easier to cut into it.

For the sauce;
Pour a generous glug of olive oil in a pan, add the garlic and stir it up.  When the garlic becomes fragrant and starts to soften, add the tomato and sauté the whole thing for a couple min.  The tomatoes will start to soften - you don't want them to mush completely.  Toss in the capers and stir to mix.

Slice the veggie bake up just like you would a lasagna.  I'd suggest using a dish with higher sides (see the picture) to keep the sauce on the plate and not the diner!  Top with the tomato caper sauce and serve!

Wednesday, June 2, 2010

The lamb experiment

I probably went about this in a dumb way.  The smart way would have involved using leftovers to make the final meal, but naturally I started with the final meal in mind and therefore made leftovers without the meal to be left over from.  Sometimes I'm a bonehead what can I say?  Anyhow....

First, I bought a beautiful pot - suffice to say it's influencing my current culinary choices in a BIG way. But look at it - isn't she lovely?


Then, I did my grocery shopping on Fresh Direct, and got a wild hair that moved me to purchase lamb shank.  That is to say I THOUGHT I was purchasing a manageable sized piece of lamb that happened to be a shank.  What I GOT was a lamb leg. Things on the Internet are not as small as they appear.  OK.  Don't have a pot that big, but OK I can work with it... Oh, did I mention?  I don't actually like lamb.  Right.  Bonehead.

Then I learned to make my own mayo - see previous post.  And I happened to have some mint lying around, and voila mint mayo.  That needed something to be spread on.  Naturally.

Finally it was Glee night and I had guinea pigs (guests) so I took a shot at an experiment - chilled lamb sandwiches with mint mayo - sounds summery and fresh right?  Well OK then.

Oven to 325

Braised lamb;
Lamb preferably on the bone
garlic
fresh herbs - I used fresh rosemary, bay and sage leaves
I also tossed in a couple spoons of dried herbs de Provence - it's my favorite mix and goes well with  nearly everything.
Couple slices of chopped up bacon
One large onion, cut into pieces
olive oil
braising liquid (clear soup stock, or beer or wine or water - whatever you want to experiment with.)

In the pot you're going to use to braise, add the bacon.  Let the bacon cook until it starts to brown and the fat renders a little - add the onions, and a splash of olive oil, and stir until the onions start to get soft and a little translucent.  Remove from the heat and set aside.

Without cleaning out the residual oils, and in the same pot brown the lamb I was working with chunks the size of a large grapefruit.  Take the meat out and set aside.

Put the onions and bacon back in the pot, add the herbs and put the lamb on top of it all.  Add enough liquid to cover the lamb chunks about half way - they shouldn't be completely immersed.  I used chicken broth and water in equal measure - alternately you could use any kind of stock, or beer or wine or plain water as well!

Bring the whole kit and caboodle to a boil, then take it off of the stove and pop it into the oven.  Cooking time will depend on volume and size of the chunks of meat - using a 5 quart pot, with big chunks of meat, it took me about 2 and a half hours to get the meat where I liked it - falling off the bone.  Many people prefer lamb cooked to cooler temps - I personally don't actually like lamb I've discovered, so I just let it go until it was buttery.

When the lamb is done, I put mine into rectangular containers, and used a turkey baster to suck the juice out of the pot while bypassing the layer of floating fat.  This went straight into the fridge.

On Glee night, I purchased a massive loaf of cibatta bread - I think any kind of bread would do, that's just the one that was 'calling' to me at the grocery (even though I don't get to eat any).

I warmed the bread according to instructions on the sleeve, cut it into manageable servings and split those open.  On one side of the bread, I spread the Mint Mayo I made the night before;

then I added wild arugula dressed in balsamic vinegar and a touch of truffled olive oil.  When the lamb comes out of the fridge, it should have taken on the shape of the container (which is why I used a rectangle) and the juice from the pot should have formed a nice little aspic like jelly.  Cut the lamb into thin slices and add it to the sandwich.


Taa Daah!   Chilled lamb sandwiches with home made mint mayo!  If I could do anything I might consider making the sandwich out of left over lamb because that's what I ate the day or couple days before.  I'd also reconsider serving my guests sandwiches that are the same size as their heads, but I have to say Anthony and Matthew did a right job of cleaning their plates!

Homemade Mayo!

I'll admit I've always been intimidated by the idea of making mayo.  I thought it took a lot of whisking and an extra set of arms.  Not so!  I looked at various recipe and techniques and cobbled together a version that was surprisingly easy and resulted in a super creamy amazing mayo!

I may never buy mayo at the store again!  Plus since I'm making it at home, I can add different things to the mayo to flavor it (like I did for the mint mayo that I used for dinner last night - pictures and recipe to follow).

Stuff you're going to need:
A food processor - mine is a KitchenAid Chef's chopper, 3 cup food processor.  Dinky, and only one speed but fits in the cupboard.


  • 1 whole egg
  • 1 tablespoon white vinegar
  • 1/2 teaspoon salt - I used a little less because my doctor wants me to cut back on salt)
  • 1 1/2 cups canola oil 

Put the egg vinegar and salt into a food processor 

Turn on the processor, and once the egg is mixed, slowly start pouring in the oil - this is the key part slowly - I mean really slooooowly.  I use squeeze bottles in my kitchen for oils - I find it's easier than dragging out the whole bottle of oil when I'm cooking - they worked GREAT to regulate the flow of oil into the processor.

Keep running the processor until all the oil is incorporated - it will magically turn into mayo!!

Took all of two minutes...


For variations of the mayo, you can add herbs, garlic, lemon - all manner of good stuff!


For example, add a healthy handfull of fresh mint for a mint mayo.  Great on a sandwich with chilled lamb!
Add grated horseradish and spread on a roast beef sandwich
Add lemon zest and smear it on multigrain with some smoked salmon
Add fresh rosemary and use it on a pulled pork sandwich


Use your imagination!

Tuesday, June 1, 2010

Poached Scallops

So it's Glee night, and I'm about to take a shot at making a new dish involving home made mint mayo and chilled lamb.  But in the mean time, here's a little appetizer of super fresh scallops - I'll be back later with Glee dinner food porn...

This one is super simple - the green stuff is snow pea sprouts which you can get in California at any self respecting Asian market for 99 cents for a massive bag.  Here in Manhattan it's more like 5 bucks for a couple ounces!  Still ... so delicious, so worth it...

Anyhow - scallops can be eaten raw, so poaching them seems to satisfy the need to cook your fish if you're so inclined.  And once you have the water boiled, it take like a minute to finish.

For the scallops
Boiling water with salt added

For the snow peas
sesame oil
minced up garlic
soy sauce

Set some water to boil first, this whole dish is a quick one - add salt and let it dissolve.  Turn off the heat and drop the scallops in, being careful not to over crowd the pot - if you have to cook your scallops in batches, just bring the water back to a boil in between.
When the scallops start to take on a slightly opaque look, pull them out of the water (should be around 2 min)  they'll still be raw in the middle. Yum!

Heat the sesame oil in a pan - not too long, sesame oil doesn't have the high temperature tolerance that some other oils do.  Toss in the garlic and keep it moving - letting it start to soften
drop in the snow pea shoots and sauté till the shoots are wilted but still vibrant green.

Serve along side a sliced scallop or two and drizzle the whole dish with a touch of soy sauce.

See?  Easy Peasy...

JG's Pears

Photo by Rick Bruner

One of my best friends Jeannette asked me to post this one.  These "poached" pears look deceptively difficult but are really easy to make.  I dipped these in dark chocolate, and served them with a chunky spiced cranberry sauce, with a pizzelle cookie on the side (cause they're pretty!)

In retrospect, I might have dipped the cookie in chocolate rather than the pear as that was more challenging than it needed to be, but either way it's a nice dessert warm or cold.

For the pears;
Bosc pears are my favorite because of the shape, color and flavor but you could substitute red pears as well
one and a half bottles of white wine, I suggest something like a Pouilly Fuse or a sweet Chardonnay
Cloves - whole, around a tablespoon give or take depending on your fondness for that flavor
Sugar - about a cup and a half and a second measure of about a cup
Vanilla extract

For the cranberry sauce;
One to two bags of whole fresh cranberries
Two large oranges - you're going to need both the skin and the flesh of at least one
one cup of sugar (give or take)
water - about 2 - 3 cups per bag
Dried chili powder if you want to add a little kick

Get the pears started first.  Peel and core the pears - if you found some with stems, then leave the stems in tact - don't worry about getting it perfect, part of the home made appeal are the variations you'll see in the final presentation.

In a large pot, combine the wine, cloves and the first cup of sugar over medium heat - bring to a slight simmer and dissolve the sugar.  Add the pears - they'll float but if possible arrange them so that the bulb of the fruit is submerged.  You'll probably have to move them around while they cook.

Once the pears are in, I like to bring the whole thing to a rolling boil once, then bring the heat down to low/medium- ish, cover the pot and let it simmer taking care not to let it boil again, for 30 to 45 min.

Now, you could zest the orange but I like the texture of slivers so carefully slice the orange skin off of at least one if not both oranges - leaving the white part or the pith behind.  Slice the orange skin into slivers and set aside.

Remove the pith and membrane from the orange, and cut up the flesh to chunks and set aside.  Squeeze the juice out of the second orange and set aside (you can use the same dish as the cut up orange).

In a separate pot, combine cranberries, oranges, orange juice and skin, sugar.  Add water till the top layer of cranberries is almost but not completely covered.  Over low heat, stew the berries, with a lid on the pot stirring occasionally - you'll start to notice that the cranberries 'burst, let them - but don't make an effort to smash them, part of the pleasure if the chunkiness of the sauce.  Stir in the chili powder if you want to add a little kick.  Set aside - refrigerate if you're going to serve the dessert chilled.

Give the pears a poke with a fork - you're looking for "al dente" here - soft enough to get the fork in, firm enough to keep their shape. Better to err on the side of firm here.  When you like the texture, turn off the heat and fish the pears out of the liquid.  If you have a rack - like a cooling rack, place the pears on it to drain a bit, if not set them aside on top of a stack of paper towels.  They need to be a little drier to dip and hold the chocolate.

Now tend to the liquid in the pot - give it a taste, do you like the level of sweetness?  Do you need to add more sugar? Turn the heat on to the low side of medium, and bring it to a simmer.  Slowly add the remaining sugar stirring as you go along until the liquid becomes syrupy.  Add a couple of drops of vanilla extract here (only if you want to)  Set aside.

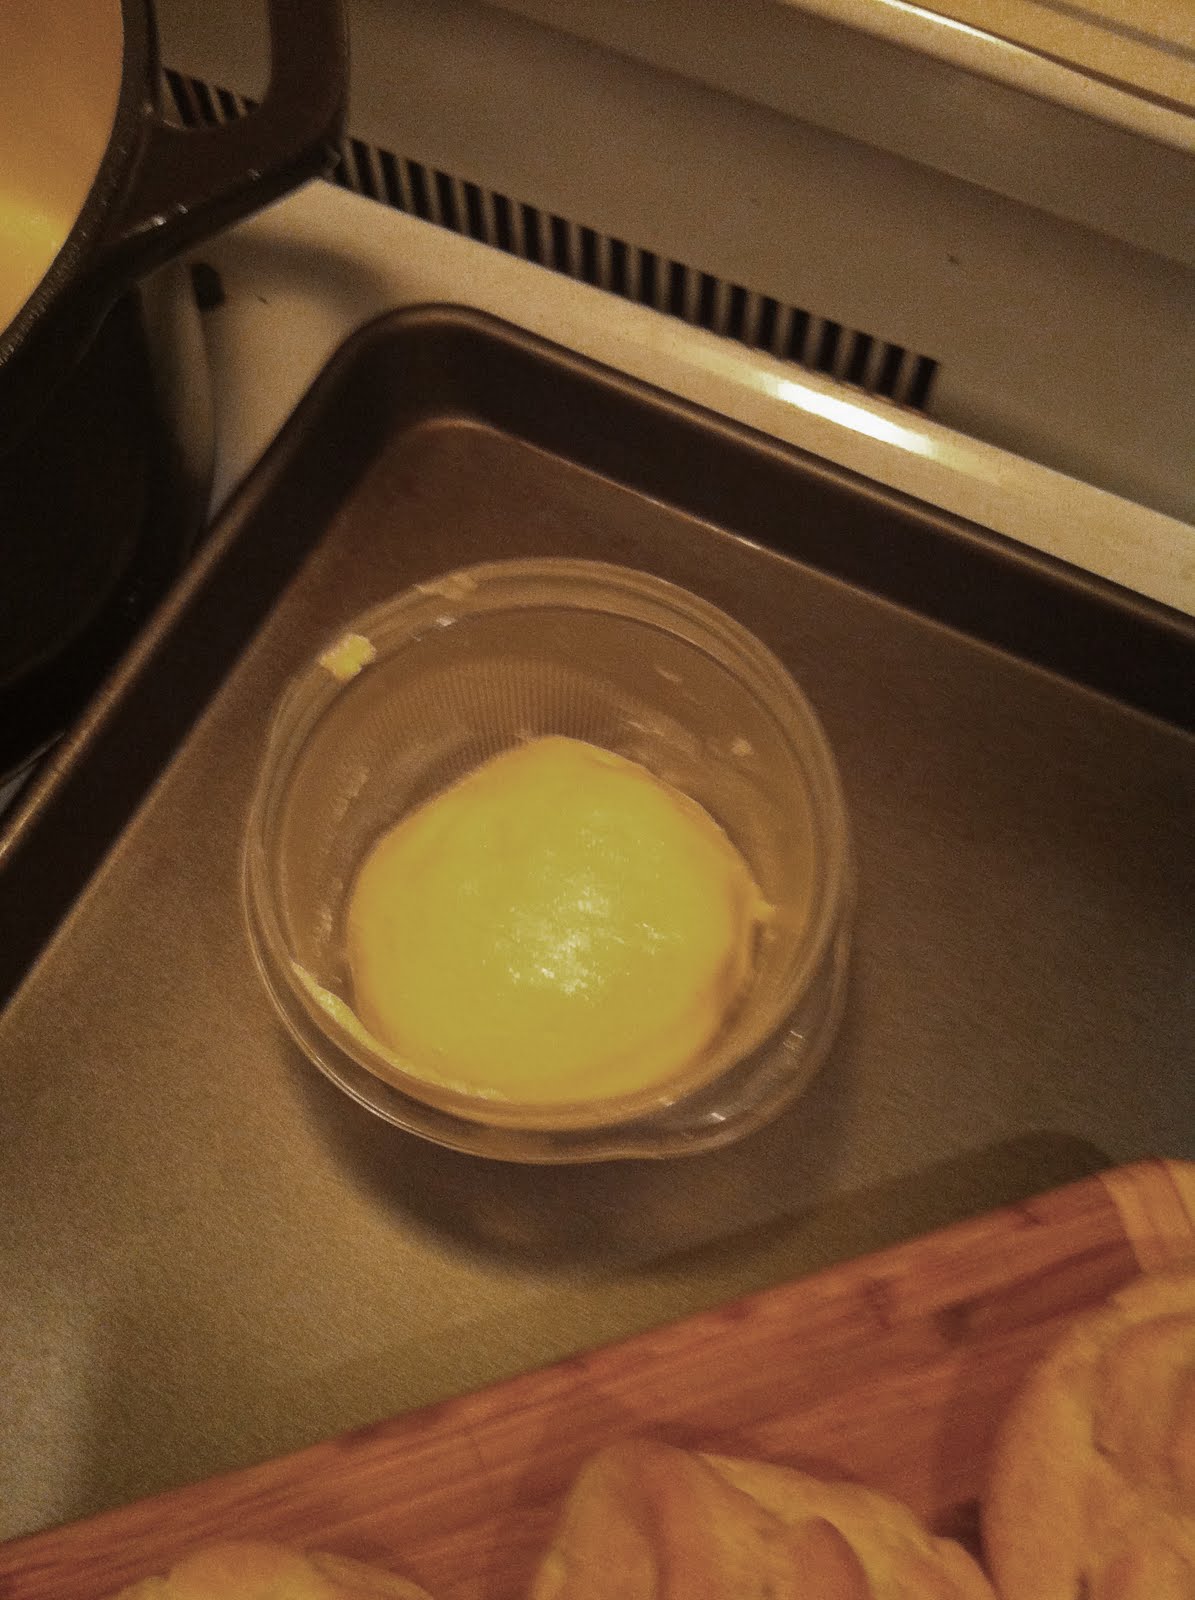
In a microwave proof bowl large enough to dip the pears in, melt the chocolate  - yes I know, it's so much cooler to do it in a double boiler but we're trying to keep it simple here.  If you want to do the extra dishes, have at it.  Otherwise back to the microwave.  I find microwaving in 30 and 60 second intervals with a good stir in between results in the smoothest melt.

Now, one at a time take a pear, dry it lightly in a clean paper towel (just pat it, don't rub!) and holding the stem, dip it in the chocolate.  This is going to make a huge mess unless you're particularly adept at handling chocolate.  Personally I'm still trying to figure out how I got chocolate on my knee.  a tidier option would be to dip the cookie, but where's the fun in that?

Set the dipped pears on a cookie sheet lined with a silpat or wax paper or parchment, and when you've dipped them all, move the tray to the fridge to get the chocolate to harden.  Now if you're like me and in a NY apartment this takes some maneuvering.  Go ahead.  We'll wait.  You have a choice here - either let the entire dish cool through to serve dessert cold, or pull it out of the fridge the second the chocolate sets.

To serve;
Place a spoonful of the chunky cranberry sauce on a plate making a little pile, put a pear down in the center and let the cranberry sauce help to hold it up. Drizzle a little bit of the syrup on the pear, add a cookie - and poof!  It looks way fancier than it really is.

Mini Frittatas


This is another example of the liberties I take with portions and amounts.  I like the idea of NOT measuring whenever it makes sense.  It's just one less thing to be intimidated by if you're not a trained cook.  Besides cooking should be FUN.  Freestyling is way more fun than measuring.  What's the worst that can happen - you make something you don't want to or can't eat.  Cest la vie - try again.

That said, I needed to find a use for my muffin pan now that I"m off carbs (again). Found it to be the perfect size for mini frittatas! Aside from the eggs all the ingredients are totally optional - get creative!

Oven to 325

One egg for each cup
splash of heavy cream
Mini - heirloom tomatoes
sliced ham (and turkey)
spinach
Sliced mushrooms
shredded cheese (I used mozzarella)

whisk eggs with cream (just 2-3 tablespoons)
spray muffin pan with non stick spray (totally optional but helps to not have to pry them out later)
place one slice of ham/turkey into each cup
add spinach or whatever vegetable you like
add the cherry tomato
divide whisked eggs evenly into each cup
top with cheese
bake until cheese starts to brown slightly about 20 min

the results are 6 single servings - super low in carbs and great for WW to since you can measure out and track points!

Alternate ingredients;
Instead of ham, try smoked salmon or turkey or chicken breast
instead of cherry tomato, maybe diced peppers
instead of spinach, try asparagus or zucchini
mozzarella can be replaced with cheddar, goat cheese, asiago etc.